Showing posts with label Wine. Show all posts

Sunday, October 2, 2011

New England Hard Cider


Found this photo on a blog called The Field Guide.  Really good example of fermenting cider.


5 GALLONS
Ingredients:


  • 5 gals. fresh-pressed sweet cider, emphasis in the blend on acidic (as much as 40 percent) and astringent apples (8 to 10 percent)
  • 4 cups cane sugar
  • 1/2 tsp. acid blend
  • 1/2 tsp. yeast nutrient
  • 7 grams wine yeast
  • 1/3 cup corn sugar
Step by Step:


Add sugar, acid, and nutrient to cider and ferment with yeast. Rack after five weeks. Bottle in 16-oz. beer bottles at about 20 weeks, priming with corn sugar. Bottle condition for 10 to 12 weeks.


source byo


Thursday, September 22, 2011

30 Day Wine

A quick and easy recipe for making a batch of wine that you can enjoy during the summer months.


* 24 oz Welch's frozen concentrated grape juice, thawed
* 3 cups sugar
* water to make up one gallon
* 1/2 tsp dry yeast
* 1 1-gallon glass jug.


Mix all ingredients together well with water filling jug to about an inch below the shoulders. Cover with a clean rag secured with rubber band. Keep in a dark place about 70 degrees. About 2 weeks later replace rag with a good thick piece of plastic wrap. After 30 days from starting date, siphon wine off from sediment in bottom and drink. For a good old "Mad Dog 20/20" type wine, add a pint of cheap blackberry brandy to the mix before drinking.


Wednesday, September 21, 2011

Dried Cranberry Wine


* 1 lb dried, unsulfited cranberries
* 2-1/2 lbs granulated sugar
* 1 tsp pectic enzyme
* 1 tsp yeast nutrient
* 1/8 tsp tannin
* 1 crushed Campden tablet
* water to one gallon
* 1 pkt Lalvin RC212 (Bourgovin) wine yeast

Chop the cranberries or run them through a mincer.

Place in primary and add one quart warm water.

Stir in crushed Campden tablet.

Cover and set aside 12 hours.

Add pectic enzyme, recover primary and set aside another 12 hours.

Meanwhile, bring remainder of water to boil and stir in sugar until completely dissolved.

Cover sugar and allow to cool to room temperature.

When 12-hour pectic enzyme treatment is complete, combine remaining ingredients in primary and add sugar water.

Stir well and cover primary.

Stir twice daily for 7 days.

Strain out cranberries, rack liquid into secondary and fit airlock.

Rack every 60 days for 6 months, topping up and refitting airlock each time.

Stabilize, sweeten to taste, wait 10-14 days, and rack into bottles.

Store in cool, dark place for additional 6 months.


Source: Jack Keller

Tuesday, September 20, 2011

Cinnamon Wine

* 12 six-inch cinnamon sticks
* 3 lbs granulated sugar
* 7-1/2 pts water
* 1 tsp yeast nutrient
* 1/8 tsp tannin
* 3 tsp acid blend
* 1 crushed Campden tablet
* Champagne wine yeast

Put cinnamon sticks and one quart water in a pot with a tight-fitting lid.

Bring to a simmer and hold for 10 minutes with the lid on, turn off heat, and let steep for two hours.

Strain the water into a secondary and discard the cinnamon sticks.

Add sugar to remaining water and bring to a boil.

Turn off heat and stir until sugar is dissolved.

Add all remaining ingredients to secondary except Campden and yeast and then pour in the sugar-water.

Cover with a napkin held in place with a rubberband and allow to cool.

Add Crushed Campden, stir, and allow to sit 24 hours covered.

Add activated yeast and recover.

Ferment 5-7 days, or until specific gravity falls below 1.030.

Fit with airlock and continue fermentation 30 days.

Rack into sanitized secondary, top up, and refit airlock.

Ferment another 3 months, rack again and ferment additional 3 months.

Stabilize, sweeten to taste, and let sit under airlock additional 10 days.

Rack into bottles and store in dark place.


Sunday, August 28, 2011

English Hard Cider


This recipe makes 5 gallons

Ingredients:

  • 5 gals. fresh-pressed sweet cider
  • 4 cups cane sugar
  • 2 cups brown sugar
  • 2 cups honey
  • 1/2 tsp. yeast nutrient
  • 1/2 tsp. acid blend
  • 7 grams wine yeast
Step by Step:

Add sugars, honey, nutrient, and acid to cider and ferment with yeast. Rack after four weeks, bottle in corked wine bottles at about 20 weeks. Age in wine-cellar conditions for six months.

source byo


Friday, August 26, 2011

Basic Equipment for Making Wine or Beer

Most people think that you need a lot of equipment  and spend a lot of money to get into making your own beer or wine. Not true.  I use a lot of stuff from my kitchen.  There are a few inexpensive items you will need to purchase.

Items you need

6 gallon food grade bucket with a lid that has a hole to fit airlocks
hydrometer
stainless steel pot (12qt to 20qt)
funnel
airlocks
thermometer - floating one is great.  I use an electronic because it is easier.
rolling pin - to crush grains
This basic equipment assumes that you are using juices to make wine and either liquid or dry malt to make beer.  In other words, real simple techniques.  As you advance in either one, you will want to pick up more equipment, but this should get you started.

18th Century Wine and Beer


When I visited Monticello several years ago, I was fascinated by Jefferson's farming techniques. I was also fascinated how that just about every family during that time period made their own beer and wine. Just think how cool it would be if everyone now made their own wine and beer. Millions of varieties to taste and enjoy. Well if you want a little background about that period, check this out from Colonial Williamsburg.


This is an old time wine recipe. I'm not sure if the powder sugar means regular sugar or powdered sugar since terms were a wee bit different than.


WINE-RAISIN or STEPHONY, may be thus made: Take two pounds of Raisins of the Sun dried, a pound of good Powder-sugar, the Juice of two Lemmons, and 1 whole Peel: Let these boil half an hour in 2 Gallons of Spring-water; and then taking the Liquor off from the Fire, pour it into an earthen Pot, which is to be cover’d close for 3 or 4 days, stirring it twice a day, and adding a little Sugar.


For you beer drinkers, here is a recipe for spruce beer.

Spruce Beer Recipe from Pioneer Thinking.
5 gallons of water
1/8 pound of hops
1/2 cup of dried, bruised ginger root
1 pound of the outer twigs of spruce fir
3 quarts of molasses
1/2 yeast cake dissolved in 1/2 cup of warm water or 1/2 cup
of liquid homemade yeast

In a large kettle combine the water, hops, ginger root and
spruce fir twigs. Boil together until all the hops sink to the
bottom of the kettle. Strain into a large crock and stir in the
molasses. After this has cooled add the yeast. Cover and leave
to set for 48 hours. Then bottle, cap and leave in a warm place
(70-75 degrees F) for 5 days. It will now be ready to drink.
Store upright in a cool place.


Lastly, if you want to know what kind of beer George Washington drank, check out this feature from National Public Radio.


Thursday, August 25, 2011

Kegging Wine

Here's an idea that I have been advocating for the past couple of years.  Basically, because I usually don't have as much time as I would like to make or bottle wine.  Just think how easy it would be to just dump 5 gallons into a keg, slightly pressurize it, and voila.  Wine on tap.

This article if from Winemaker magazine.

Kegging Wine: Techniques
Feb, 2006
by Chris Colby
Tired of corking bottle after bottle? Learn about the 5-gallon (19-L) "bottle" that holds the equivalent of 25 standard (750 mL) wine bottles -- the Cornelius keg.
Sparkling wine usually comes packaged in either standard-sized wine bottles (750 mL), half-bottle-sized splits or Magnums, which hold the equivalent of two standard wine bottles. However, less common, larger bottle sizes include Jeroboams (which hold 4 standard bottles of wine), Methuselahs (8 bottles), Balthazars (16 bottles) Nebuchadnezzars (20 bottles), Melchiors (24 bottles) and Sovereigns (34 bottles). There is also a size between Melchior (18 L) and Sovereign (25.5 L) that you may never have heard of — the Cornelius (18.9 L).

Tuesday, August 23, 2011

Acid Level Chart For Wine Making

This chart has a few fruits and vegetables and the amount of acid that they contain.  This should help you in determining how much additional acid you would need to use.
Acid Levels
Low Acid Medium Acid High Acid
Beets Apples Blackberries
Dates Apricots Currants
Dried Fruits Cherries Gooseberries
Elderberries Grapes Loganberries
Figs Juice Concentrates Quinces
Flowers Nectarines Raspberries
Herbs Oranges Rhubarb
Pears Peaches Strawberries
Rose Petals Plums
Tangerines


Friday, August 19, 2011

Apple Wine Recipe


  • 16 cups apples, cored and chopped
  • 2 pounds raisins
  • 1 cinnamon stick (optional)
  • 4 1/2 cups granulated sugar
  • 1 teaspoon yeast nutrients
  • 1 1/2 teaspoon acid blend
  • 1/2 teaspoon pectic enzyme
  • 1 campden tablet
  • 1 gallon water, hot
  • 1 package wine yeast (for 1 to 5 gallons)
Place fruit in primary fermentor. Pour boiling water over it. Let sit overnight.
24 hours later, add balance of ingredients. Stir to dissolve sugar. Stir daily for 5 to 6 days or until frothing ceases. Strain out fruit and squeeze as much juice out of it as you can. Siphon into secondary fermentor and attach airlock.


For a dry wine, rack in three weeks, and every three months for one year. Bottle.


For a sweet wine, rack at three weeks. Add 1/2 cup sugar dissolved in 1 cup wine. Stir gently, and place back into secondary fermentor. Repeat process every six weeks until fermentation does not restart with the addition of sugar. Rack every three months until one year old. Bottle.


If wine is not clear, or still has quite a bit of sediment forming between rackings, Fine the wine as follows.


Use wine finings or plain gelatin. Gelatin: use 1 teaspoon per 6 gallons of wine. Finings: 1/2 teaspoon per 5 gallons or as per package directions. Soak in 1/2 cup cold water for 1/2 hour. Bring to a boil to dissolve. Cool. Stir into wine. Let sit 10 to 14 days. Rack. If not clear enough yet, repeat process. DO NOT increase amount of gelatin or finings. The mixture will stay suspended in the wine, preventing it from ever clearing. Bottle once wine is clear.
The wine is best if you can refrain from drinking it for one full year from the date it was started.


NOTE: The best apples to use are tart apples such as winesap, jonathans, etc and not the delicious apples.


Thursday, August 18, 2011

Wine Making Kits for Homemade Wines

by Rio Regio


Wine making and fermenting your own homemade wine takes a lot of time and effort. It doesn't necessarily equate to being a complicated process, the procedure is actually very simple but the whole wine making process will require an extended period of toiling.Most people would define wine as an alcoholic beverage made from fermented grape juice. It is a popular definition because grapes are the usual base fruit or juice used in making wines, but according to some wine connoisseurs , Wines are basically any alcoholic drink produced from any non-toxic fruit juice (Strawberry wine, Pear Wine, Apple Wine, etc.)


Wine making consists of very simple steps that any person with the right equipment could do. As long as you have the basic wine making kit, you could produce wine whenever you desire.


Making homemade wines if, done properly, could produce good quality wines that may taste just as good as any commercially available wines. And since you are the one making your own drink, you could experiment on the acid levels, alcohol levels and the sweetness of the beverage that would suit your taste.


If you're planning to produce your own homemade wine, you will need a few equipment necessary for the fermentation of the juice. The list of equipments consists of the following:


1. A primary (primary fermentation vessel) which most of the time comes in the form of a plastic bucket or pail. This is where you will mix your concoction together with your ingredients.
2. A sieve or a mesh bag or a nylon straining bag where you will put your chopped, crushed or sliced fruits during flavor and aroma extraction.
3. Sterile cloth that will cover your bucket during the primary. This will prevent contaminants and bacteria from getting in to your concoction and at the same time, it will allow the unwanted vapors from your mixture to escape.
4. A siphon hose which you will use when you are going to transfer the wine from the primary to the secondary fermentation vessel. You will also use this when you are going to rack your wine.
5. A secondary fermentation vessel, most of time, Carboys are used as secondaries because it is easy to airlock and it is more resistant to scratching.
6. Air locks which is vital for the anaerobic fermentation process that the mixture must go through to produce wine.
7. Bottles which will be used for aging the wine.
8. Corks to secure the wine inside the bottles.
9. Hydrometer, which is one of the most important equipments you will need because this will measure the specific gravity of the wine.


The listed items is actually the basic wine making kit. Some of the tools you will need that were included on the list could be replaced by or substituted by common household items. Just remember that the substitutes you will use are sanitized and sterile.


Using tools that haven't been properly sanitized may cause spoilage in the wine you are making.


Of course, there are other tools and equipments as well that you could use to ferment your own homemade wine. But some of those are already for advanced wine makers. As a beginner, the list should suffice until you have become a true fanatic of homemade wine making.


There are additional ingredients or additives as well that you will require when making your homemade wine. These ingredients may not be bought from regular convenient stores and may be difficult to find. If there is a Wine Maker store near your place, then you are in luck, otherwise, these essential ingredients will be difficult to obtain.


These additives required in wine making are:


1. Sulfites, the most common sulfite used is the Campden Tablet
2. Acid Blend or Citric Acid
3. Tannin
4. Pectic Enzyme
5. Potassium Sorbate
6. Yeast Nutrient
7. Sugar
8. Yeast
9. Wine Finings


All of these ingredients are essential to wine making. If one of these is absent or missing during your wine making process, it is likely that the fermentation will produce a bad batch of wine or the fermentation will not be successful at all.


Be sure that before you start making your wine, you have the complete ingredients along with your complete tools.


Now that we have listed the complete basic wine making kit you will need to ferment your alcoholic beverage, we are going to give you a simple step by step instruction on how to turn your fruit juice into wine.


1. Fruit preparation - from the moment you pick out and choose the fruit you will be using as your base fruit, it is already part of the wine making process. This also entails the chopping, slicing and crushing of the fruit which will be put in the straining bag or sieve in the primary.


2. Pour water in the primary where the bag is. Whether to use cold or hot water will depend on the specific instructions of that specific recipe you are making.


3. Adding the Ingredients - All additives that were listed, except the wine yeast and the yeast nutrients will be added in the concoction. These should be mixed until all the ingredients have dissolved.


4. Cover the primary with the sterile cloth and leave for at least 24 hours depending on recommended specific gravity required as specified in the recipe.


5. Transferring to the secondary - When you have reached the recommended specific gravity, you will now have to transfer the must into the secondary, add the yeast and yeast nutrients, stir then cover with air lock.


6. Racking - When the wine have reached a specific gravity as indicated in the wine making recipe you have, you will need to transfer the wine to another secondary vessel. You are to leave the lees or the sediments found at the bottom of the Carboy. These lees are dead yeast cells. Prolonged exposure to it may cause the wine to taste bad.


7. Rack again - After a recommended period, you may check your wine's clarity. If the wine is already clear and has no more sediments at the bottom of the vessel, you may proceed to the next step. Otherwise, you will have to rack again and again until the wine becomes clear and free of lees.


8. Bottling - once the wine is already clear, this is will indicate that the fermentation process is over. You may now transfer the wine in smaller bottles.


9. Aging - this step will require a really long time. It may take six months to a year before the wine is aged enough to have that good taste. The recipe or wine book you are following should have a recommended period of time for the aging process. Once it has aged long enough, you may now taste your wine to see if it still needs to age longer.


10. Enjoying - At this point, your wine have already aged long enough and already tastes like expensive wine. It is now time to enjoy your home made wine.


The listed steps are the general steps in fermenting homemade wine using wine making kits. If you will notice, it was mentioned repeatedly that some procedures will depend on the recipe you are following. This is because the amount of time, additive or ingredients required may vary from one fruit to another or from one variety of fruit to another.


Each fruit and each variety of fruit will have its own characteristics and its own level of acidity, sweetness and the like which may affect the variation of needed additives.


Now, if you find these steps complicated, you may want to start with fermenting fruit juices i wine kits. There are Wine kits available now that sells concentrated juice together with pre-measured ingredients to add and an easy to follow recipe or instructions to homemade wine making.


These wine kits are expensive and don't come with the wine making equipment but if you really want to learn, this may be the simplest and easiest way to learn since everything is already laid out for you. Just so you'd get the feel of fermenting wine. But if you really want to experience first hand what it's like to make wine from choosing the fruit to enjoying the beverage, then you better start looking for fully ripe fruits now.


If you are wondering what kind of fruits you could ferment and turn into wine, and what flavors wine kits offer, we suggest that you visit the blog site, Wine Making Kits. It has additional information of the process of making homemade wine and some information on the available kits in the market.


About the Author


A budding writer that is harnessing his skills by composing articles on various unrelated materials with varying difficulty, popularity and theme.


Wednesday, August 17, 2011

Black Tea Wine


Photo by: sarahemcc

* 4 tablespoons bulk black tea
* 1 11-oz can frozen red or white grape concentrate, depending on desired color
* 2 lbs sugar
* 2 tsp citric acid
* 6 pts water
* 1 tsp yeast nutrient
* 1 pkt wine yeast

Bring water to a boil and pour over the tea and sugar, stir well, and infuse until cool. Strain into primary, add grape concentrate, acid, nutrient and yeast. Cover and ferment until s.g. drops below 1.020. Transfer to secondary, fit airlock and ferment to dryness. Rack when wine is clear and completely dry, top up and refit airlock. Rack again after 45 days, stabilize, refit airlock, and set aside for 3-4 weeks. Sweeten to taste if desired and bottle.


Friday, August 5, 2011

Is Your Cellar Stable For Wine Storage?

Melanie Hudson


There are three wine storage golden rules to follow! Wine cellar has to be dark, humid and cold. All of those three conditions are crucial for right aging of your wine. Why is light so damaging for wine? Wine is an organic liquid. And each carbohydrate organic compound like proteins is sensitive to ultraviolet (UV) light. What will UV light do to wine? It will cause complex organic molecules in wine to dissolve and they will start to ruin the flavor and the natural aging process of wine. The same effect will excessive sunbathing have on your skin. Ultraviolet light, as a part of sunlight is degrading proteins in our skin. The effects are well known. In extreme cases UV light can cause uncontrollable growth of cell structures leading to skin cancer.


Those who want to buy a ready-made wine cellar unit with integrated cooling and humid control center should also pay attention to the light source provided within. Neon light emits much more UV light than a classical light bulb. It may not make a difference for wine bottles that will be consumed within a year. But for storage of wine bottles that can age for centuries, those short periods of UV exposures within 10 or more years, quickly sum up.


Why should you pay attention to humidity in your wine cellar? Humidity is important for storing wine bottles traditionally sealed with cork. Despite the fact that there are many other wine sealing materials on the market, you will not find a serious top wine producer using anything other than a cork. What is the relationship between the cork and the humidity? The cork has to be in regular touch with humidity on both sides. That means the inner side, reaching into the bottle has to be in contact with the wine (that is why wine cellar storage racks will store wine horizontally), the outer side of the cork has to be in environment humid enough to prevent cork from drying. A dry cork becomes porous and the air starts to leak into the bottle, spoiling the wine. How will you know if you cellar is humid enough? Relative humidity in a room can be measured with humidity meters called hydrometers. Those are really cheap and easy to buy in any wine storage accessories store. What is humidity important for a perfect wine aging process? According to French wine experts and scientist, perfect humidity level of a wine storage cellar lays between 60-70%. But more than humidity levels in a cellar, the quality of cork itself is the crucial factor in preventing the wine from leaking or from spoiling.


If you ask any wine expert on the world which from those three golden rules plays the most important role in fine wine aging, they would unanimously say-The Temperature. The best temperature for wine storage is traditionally believed to be 55°F or 13°C. Little research has been made to discover why exactly that temperature. But more than the temperature itself, it is important not to let the temperature fluctuate for more than 1 degree. Quality wine needs stable conditions to gradually develop its best aroma, taste and color.


About the Author
For more on special wine cellar equipment visit wine-storage-racks.com


Wednesday, July 6, 2011

Basic Tips For The Home Grape Growing Gardener

By Matt Granger


One of the things that I always found to be beautiful when I was young was to see a trellis covered with clusters of grapes hanging from the vines. Not only did the vines have a function but they brought beauty as well. I always found backyard grape growing to be fun even as a child and I would like to share with you some of my experiences.


Grape growing is actually something that is not too hard to do. For thousands of years people have been growing grapes and perfecting the art of pruning and caring for them. Now there are many modern twists to make it even easier. We don't have to haul water from a creek that is a mile away and we don't have to keep the soil nice with a hoe in the bright summer sun.


The art of grape growing is one that should be showed to our younger generation so that they realize that not all produce has to come from a grocery store. They can grow them right in their own backyard and be overjoyed when they see the first clusters begin to form on the vines. So often the younger generations have no idea where things really come from and grape growing would be a wonderful way to show them.


When you decide that grape growing is something that you want to do, all you will need is some soil that has been fertilized and some patience. I say patience because these vines will need love and attention for a few months before you are able to reap the fruits of your labor, pardon the pun. Gardening of any type takes patience and grape growing is no exception.


To achieve the best soil possible for grape growing you will of course need to fertilize the soil. There are many types of fertilizer available from organic to a chemical fertilizer, all able to help you achieve a beautiful grape vine.


Organic fertilizers such as manure are great because they have been around since time began and have been able to still keep this world green. Seems to me that most of the chemical fertilizers can't say that about themselves. But there are many people who would rather not spread manure as they think it's gross and so if you are one of those people, the store bought fertilizers might be for you. They will achieve the same goal, just with a different ingredient.


If possible, try to fertilize the soil before you go planting. I know that many, like myself, are terrible at planning ahead. So if you are one that didn't plan ahead, then you are always able to spread fertilizer once the vine roots have been placed in the ground.


The last thing to remember about grape growing is that these grapes do need to be watered. On average a grape vine needs to get an inch of rain a week to grow properly. When you are going through a dry spell you will of course need to water the plant yourself. If you fertilize appropriately and water when needed, you should get some super growth on your vine the first year. Growth on the vine the first year is very important for the future of your plants.


So remember, with grape growing you mainly need some patience, water and a little manure and you'll be set.


Matt Granger has been growing grapes for over 30 years and is an expert in backyard grape growing and grapevine farming. For a bundle of free tips and advice on how to grow grapes, visit his personal grape growing website here: www.grapegrowingsecrets.com


Article Source: http://EzineArticles.com/?expert=Matt_Granger
http://EzineArticles.com/?Grape-Growing---Some-Basic-Tips-For-The-Home-Grape-Growing-Gardener&id=1205015
Have New Posts From Making Homemade Wine and Beer Delivered To Your Email

Monday, June 13, 2011

30 Day Wine

24 oz Welch's frozen concentrated grape juice, thawed
3 cups sugar
water to make up one gallon
1/2 tsp dry yeast
1 1-gallon glass jug.


Mix all ingredients together well with water filling jug to about an inch below the shoulders. 


Cover with a clean rag secured with rubber band. 


Keep in a dark place about 70 degrees. 


About 2 weeks later replace rag with a good thick piece of plastic wrap. 


After 30 days from starting date, siphon wine off from sediment in bottom and drink. 


Friday, May 27, 2011

3 Common Mistakes To Avoid When Growing Grapes


By Matt Granger


Growing Grapes is one the few overlooked yet most promising and exciting outdoor hobbies one can become involved in. It is fun, challenging, and best of all rewarding in the sense that once you have a fully grown grape farm or grape garden, you will enjoy the benefits of having fresh wine grapes to eat at your convenience. Plus, since growing grapes is an outdoor hobby, it will force you to get out of the lazy chair and out into the open and truly become one with nature.


Growing Grapes while appealing to most because of the delicious home grown wine grapes can be quite challenging at times. There are a few common mistakes that many new grape growers commit. I would like to cover them briefly with you now.


Growing Grapes Common Mistake #1:
One of the most common grape growing mistake new grape gardeners commit involves purchasing already grown grapevines and planting them in their garden. Here is the problem that lies with this situation. Your local nursery will buy grapevines in bulk for a low price and will put them on sale. They will look all nice and pretty at the nursery since they just brought them in. However, what you the customer doesn't know is that these grapevines have come from different parts of the country, places where in fact the grapevines were growing really healthy and strong.


You see, climate and atmosphere plays a key role in successful grape growing. When growing grapes in different parts of the country, you can expect totally different results with your grapevines. Different in climate alone will affect the types of disease your grapevines might get plagued with or when they will fruit better, if at all. Therefore, do not be fooled by what is being sold to you at the nursery. It is best to verse yourself on how to grow grapes from an expert and understand how the climate in your area will affect your vines.


Growing Grapes Common Mistake #2:
The second most common mistake committed when growing grapes is the eagerness for spraying.
I understand it is frustrating to see a few insects on your vines and can become quite irresistible to hold back from spraying your grapevines clean. Well, don't go too trigger happy. There are plenty of other procedures that you can use to keep your grapevines under pest control. Spraying should only be used when it is truly needed because you can risk killing off everything else in the area that normally would've controlled those pesky pests.


Growing Grapes Common Mistake #3:
Finally we come to the third most common mistake of growing grapes. This one involves planting grapevines without learning how to train grapevines first. That's like buying a car without knowing how to drive. Grapevines require proper training and pruning in order for them to grow successfully and most rookie grape gardeners just do not understand that growing grapes takes more than just planting a few grapevine seeds and watering them everyday.


Growing grapes can start from a fun hobby to ultimately becoming a full time career. However, it takes some skill and knowledge to fully succeed in growing grapes. Otherwise you will probably commit some of the costly, rookie mistakes covered above.


Visit this link to begin learning the skills necessary for growing grapes . Matt Granger has been growing grapes for over 30 years and is an expert in backyard grape growing and grapevine farming. Visit his personal grape growing website here: http://www.grapegrowingsecrets.com


Article Source: http://EzineArticles.com/?expert=Matt_Granger
http://EzineArticles.com/?Growing-Grapes---3-Common-Mistakes-To-Avoid-When-Growing-Grapes&id=603506


Wednesday, May 25, 2011

Zucchini Wine


  • 4 pounds zucchini
  • 3 campden tablets 
  • 2 oranges
  • 2 lemons 
  • 7 cups sugar
  • pectic enzyme 
  • nutrients 
  • 1 package wine yeast 
  •  water 
  1. Wash zucchini. Leave skin on. Chop zucchini and place in primary fermentor.
  2. Wash oranges and lemons. Slice thinly and add to zucchini. 
  3. Stir in sugar and nutrients. 
  4. Pour 16 cups boiling water over mixture. Stir to dissolve sugar. Let cool. 
  5. Add pectic enzyme. 
  6. The next day, check specific gravity -- it should be between 1.090 and 1.100.
  7. Add yeast. 
  8. Stir daily for five days, until frothing stops. Strain. Siphon into secondary fermentor and attach airlock. 
 For a dry wine, rack in three weeks, and every three months for one year. Bottle. 


 For a sweet wine, rack at three weeks. Add 1/2 cup corn syrup dissolved in 1 cup wine. Stir gently, and place back into secondary fermentor. Repeat process every six weeks until fermentation does not restart with the addition of syrup. Rack every three months until one year old. Bottle. 


Variations:


1. Instead of granulated sugar, try honey or brown sugar.  
2. For a spiced wine, add 1 ounce fresh ginger root, sliced thin, to the water before boiling it. Let it simmer for about 15 minutes before pouring it over the cucumbers. 


NOTE: This recipe makes 1 gallon of wine. To make a larger batch of wine, just multiply all ingredients by the number of gallons you want except the yeast. One packet of wine yeast is sufficient for up to 5 gallons of wine.


photo by: Jeremy Keith 

Friday, May 6, 2011

Cinnamon Wine


Photo by: S. Diddy


* 12 six-inch cinnamon sticks
* 3 lbs granulated sugar
* 7-1/2 pts water
* 1 tsp yeast nutrient
* 1/8 tsp tannin
* 3 tsp acid blend
* 1 crushed Campden tablet
* Champagne wine yeast


Put cinnamon sticks and one quart water in a pot with a tight-fitting lid. Bring to a simmer and hold for 10 minutes with the lid on, turn off heat, and let steep for two hours. Strain the water into a secondary and discard the cinnamon sticks. Add sugar to remaining water and bring to a boil. Turn off heat and stir until sugar is dissolved. Add all remaining ingredients to secondary except Campden and yeast and then pour in the sugar-water. Cover with a napkin held in place with a rubberband and allow to cool. Add Crushed Campden, stir, and allow to sit 24 hours covered. Add activated yeast and recover. Ferment 5-7 days, or until specific gravity falls below 1.030. Fit with airlock and continue fermentation 30 days. Rack into sanitized secondary, top up, and refit airlock. Ferment another 3 months, rack again and ferment additional 3 months. Stabilize, sweeten to taste, and let sit under airlock additional 10 days. Rack into bottles and store in dark place. [Adapted from Terry Garey's The Joy of Home Winemaking]

Source: Jack Keller


Wednesday, May 4, 2011

Corn Wine


* 2 lbs cracked corn
* 1 lb chopped golden raisins
* 3 lbs granulated sugar
* 4 tsp acid blend
* 1 tsp yeast nutrient
* 1/2 tsp tannin
* water to one gallon
* 1 crushed Campden tablet
* Champagne or Sherry wine yeast


Rinse the corn well, checking for any pebbles or other foreign matter. 


Put chopped raisins and corn in a bowl and cover with enough water to cover the corn. Soak overnight. The next day, pour corn and raisins in a fine nylon straining bag, tie the bag closed, and put in primary. 


Pour the soaking water into primary. Put remaining water on to boil with sugar in it. Stir well as water heats up until sugar is dissolved and water comes to a boil. Pour water into primary. 


Add the acid blend, yeast nutrient and tannin. Cover primary with a sheet of plastic held in place with a large rubber band or loop of elastic. When cooled to room temperature, add crushed Campden tablet, recover, and set aside for 24 hours. 


Meanwhile, boil a cup of orange juice, transfer to a sterilized pint jar and set in refrigerator 30 minutes to cool. When cool, add yeast to orange juice and cover with plastic wrap. After 24 hours, add orange juice to primary. 


Stir daily for two weeks. Remove bag of corn/raisins and allow to drip drain (do not squeeze). Discard corn/raisins, recover primary and allow liquor to settle overnight. 


Rack into secondary and fit with airlock. Rack every two months for six months. After sixth-month racking, check for dryness. If not completely dry (specific gravity of 0.990), allow another two months and rack again. When dry, bottle the wine. May drink immediately. [Adapted from Terry Garey's The Joy of Home Winemaking]


Source:  Jack Keller
Picture by:  Normanack

Monday, May 2, 2011

Green Tea and Ginger Wine


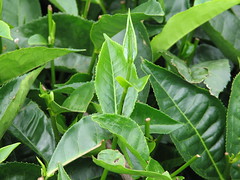
Photo by: Kanko

16 teaspoons or teabags of Green Tea
1 cup chopped white or golden raisins
1 ounce thinly sliced ginger root
2 lbs granulated sugar
zest & juice of 1 lime
zest & juice of 2 small lemons
water to 1 gallon
1 tsp yeast nutrient
1 pkt wine yeast


Boil water and pour over all ingredients but yeast (in primary). When water cools to under 100 degrees F., add activated yeast. When specific gravity drops to 1.015-1.010, strain tea, ginger and zest. Transfer liquid to secondary and attach airlock. Ferment to dryness, rack, top up, and reaffix airlock. Stabilize when clear. Wait 30 days, sweeten if desired, and rack into bottles. Allow 3-6 months to smooth out.


This recipe is Jack Keller's and can be found on his site Winemaking Home Page.