Submitted by: Jude
You've decided that you want a vegetable garden to lower your grocery bills. But, where do you start? There are eight essential steps to successful vegetable gardening.
Step 1. Pick an appropriate area for your garden. When you choose your site, consider these important factors:
- Sunlight. Most vegetables grow best in full sunlight. Choose an area that gets at least six hours of sunlight a day.
- Soil. The best soil for growing vegetables is a dark soil, rich in nutrients, that has good drainage but will still hold sufficient moisture for the plants. Don't plant your garden too close to trees and shrubs whose roots will steal nutrients and water from the vegetables.
- Water. Place your garden near your water supply -- faucets that can be reached by no more than two hose lengths.
Step 2. Create your site plan. Make a plan before you purchase your seeds or plants. It will help you decide how many you need to buy to best fit the available space. Base your plan on the vegetables that your family likes, how much work you want to do on the garden and how much room there is in the garden. Create a quick sketch to follow while you are planting.
Step 3. Buy your plants and/or seeds. Be sure that the plants you get will grow well in the area where you live. Buy young, healthy plants that are not limp or straggly or that have been over-crowded in pots. On seeds, look at the date stamp on the package to make sure they are not too old.
Step 4. Prepare your soil for planting. This is one of the most important things to do for a successful garden. To prepare the soil, add a layer of compost or fertilizer over the top of the soil. Then till (or spade) this layer into the existing soil. Rake the soil into rows or mounds, depending on the type of vegetables you'll be planting.
Step 5. Sow your seeds. If some of your vegetables will be planted from seeds, plant them first. Sometimes seeds are started indoors or in a greenouse to give them a good start. When seedlings appear, thin them to the distances recommended on the seed packets.
Step 6. Plant your plants. Plant young plants following the directions given by the plant nursery where you purchased them. Planting times can be tricky. You want to plant early, but not so early as to stunt their growth in cooler weather. Some plants will require netting or wire forms for best results.
Step 7. Care for your growing plants. Once your vegetables are all planted, you need to care for them by watering, weeding, pruning, and protecting them from insects.
Step 8. Harvest your garden. Different vegetables are harvested at different times. Vegetables should be carefully watched and picked at their peak. You may eat them immediately after harvesting or you can freeze or can them for later use.
About Author: Jude Wright is an author and avid gardener. Find out how you can have a beautiful and successful garden by going to http://GuideForGardeners.com.
Article Source: ArticlesAlley.com
Thursday, June 30, 2011
Wednesday, June 29, 2011
Ginger Pumpkin Soup
Ingredients
2 can(s) (15-ounce) pumpkin puree
3 can(s) (14 1/2-ounce) chicken broth
1 can(s) (11 1/2-ounce) pear nectar
1/3 cup(s) creamy peanut butter
2 clove(s) garlic, finely chopped
2 tablespoon(s) grated fresh ginger root
2 tablespoon(s) finely chopped green onion
1 tablespoon(s) fresh lime juice
1/2 teaspoon(s) salt
1/4 teaspoon(s) ground cayenne pepper
Toasted pumpkin seeds (optional)
Chopped chives (optional)
Directions
In a 6-quart saucepan, combine pumpkin puree, chicken broth, and pear nectar. Bring to a boil over high heat. Cover, reduce heat to low, and simmer 10 minutes.
In a blender or the bowl of a food processor fitted with chopping blade, process 1 cup pumpkin mixture with peanut butter until smooth. Return to saucepan with the remaining pumpkin mixture. Add garlic, ginger root, green onion, lime juice, salt, and cayenne pepper; cook 10 minutes over medium heat.
Divide soup among soup plates and garnish with pumpkin seeds and chives, if desired. Serve immediately.
Tuesday, June 28, 2011
Apple Oatmeal
Ingredients:
2 cups low-fat milk
2 tablespoons honey
1 tablespoon butter
1/4 teaspoon salt
1/2 teaspoon cinnamon
1 cup rolled oats
1 cup chopped apples
1/2 cup raisins
1/4 cup walnuts, chopped
1/2 cup light cream or low-fat milk
Turn this recipe into a puzzle! [click]
Directions:
Spray inside of 2-qt slow cooker with non-fat cooking spray. Combine all ingredients but cream and pour into cooker.
Cover and cook on low overnight, ideally 6-8 hours. Stir in cream just prior to serving.
Source: Overnight Apple Oatmeal Crock Pot Recipe @CDKitchen
Picture by: Abhijit Tembhekar
Monday, June 27, 2011
New Orleans Pralines

Photo by: djprybyl
Ingredients:
* 1 cup granulated sugar
* 1 cup packed brown sugar
* 1/2 cup evaporated milk
* 4 tbsp butter, cubed
* 2 tsp vanilla extract
* 1.5 cups toasted pecans, coarsely chopped
Preparation:
1. Prepare a baking sheet by lining it with aluminum foil and spraying the foil with nonstick cooking spray.
2. In a medium saucepan combine the brown sugar, granulated sugar, and evaporated milk over medium heat. Stir until the sugar dissolves, then insert a candy thermometer.
3. Cook the candy, stirring occasionally, until the candy reaches 240 degrees on the thermometer.
4. Once the proper temperature is reached, remove the pan from the heat and drop the chunks of butter on top, but do not stir. Allow the pan to sit for one minute.
5. After a minute, add the vanilla extract and the pecans, and begin to stir smoothly and constantly with a wooden spoon. Soon the candy will begin to get thicker and lighter in color.
6. Continue to stir until the candy starts to hold its shape. It should still be easy to stir, however. It is important not to stir too much, as pralines quickly go from fluid to rock-solid. Once it is a lighter, opaque brown and holds its shape, quickly begin to drop small spoonfuls of the candy onto the prepared baking sheet.
7. Work quickly to form the candies, as the pralines will start to set in the saucepan. If the candy stiffens before you’re done scooping, add a spoonful of very hot water and stir until it loosens, then continue scooping until you have formed all the pralines.
8. Allow the candy to fully set at room temperature, for about 30 minutes. Store New Orleans Pralines in an airtight container at room temperature.
Source: New Orleans Pralines Recipe
Sunday, June 26, 2011
Four Bean and Kielbasa Chili
Serves 6 to 8
2 tablespoons or more olive oil
1 ½ lbs. turkey or beef kielbasa, halved lengthwise then cut in to ½ – inch pieces
1 large onion, chopped
1 red bell pepper, coarsely chopped
1 green bell pepper, coarsely chopped
4 large garlic cloves, chopped
4 15 oz cans beans, drained
2 cups chicken or vegetable broth or water
1 14 oz can diced tomatoes in juices
3 tablespoons chili powder
2 tablespoons sugar
2 tablespoons red wine vinegar
1 generous splash dry red wine (optional)
3 small bay leaves
1 tablespoon dried oregano
2 teaspoons ground cumin
Heat 2 tablespoons olive oil in a large pot over medium-high heat. Add kielbasa; sauté until beginning to brown, 10 to 12 minutes. Using a slotted spoon, transfer kielbasa to a bowl. If necessary, add enough oil to the pot to measure 2 tablespoons, or discard all but 2 tablespoons of drippings. Add onions, both bell peppers, and garlic. Saute until beginning to brown, about 10 minutes. Add beans, broth or water, tomatoes with juice, chili powder, sugar, vinegar, bay leaves, oregano, cumin, and red wine, if using. Bring chili to a boil, stirring occasionally. Reduce heat to medium-low, cover, and simmer 45 minutes. Return kielbasa to the pot. Reduce heat to low. Simmer, uncovered, until chili is thick, stirring occasionally, for about 30 minutes. Season with salt and pepper.
Source: Four Bean and Kielbasa Chili

Saturday, June 25, 2011
Pumpkin Apple Dessert

1 can (21 ounces) apple pie filling
2 cups Gold Medal® all-purpose flour
1 1/4 cups packed brown sugar
1 cup canned pumpkin (not pumpkin pie mix)
3/4 cup fat-free cholesterol-free egg product
1/3 cup vegetable oil
2 teaspoons baking powder
1 teaspoon ground cinnamon
1/2 teaspoon ground nutmeg
1/4 teaspoon baking soda
Ice cream, if desired
1. Spray 3 1/2- to 6-quart slow cooker with cooking spray. Spoon pie filling into cooker; spread evenly.
2. Beat remaining ingredients except ice cream with electric mixer on low speed 1 minute, scraping bowl constantly. Beat on medium speed 2 minutes, scraping bowl occasionally. Pour batter over pie filling.
3. Cover and cook on High heat setting 1 hour 30 minutes to 2 hours or until toothpick inserted in center comes out clean. Serve with ice cream.
Note: This recipe was tested in slow cookers with heating elements in the side and bottom of the cooker, not in cookers that stand only on a heated base. For slow cookers with just a heated base, follow the manufacturer’s directions for layering ingredients and choosing a temperature.
Source: Slow Cooker Pumpkin-Apple Dessert Recipe from Betty Crocker
Friday, June 24, 2011
Lobster and Brie Soup
Ingredients
* 3/4 pound lobster tail
* 1 1/2 cups IPA
* 3 1/2 cups water
* 1 tsp thyme, finely crushed
* 3 cups half n half
* 4 tbs butter
* 3 shallots, finely minced
* 3 cups heavy cream
* 1/2 lb brie cheese, with skin, cut into 6 chunks
* fresh ground pepper fresh ground pepper
Instructions
1. shell the lobster reserving shell for stock
2. to make sure stock, combine the beer, water, thyme, and lobster tail shell. bring to a slow boil, cover, and simmer on low for 40 minutes
3. strain then simmer to reduce broth to 2 1/2 cups. add half and half and continue simmering until reduced by half again. cover and set aside
4. in a heavy skillet, melt butter on medium. when foam subsides, add shallots and saute for 1 minute. add lobster meat and saute briefly unitl the lobster turns pink. remove and cool. pull lobster meat into shreds
5. add heavy cream and brie cheese to the reduced broth, stirring constantly over med-low heat. when the cheese is almost melted, mix in shredded lobster and shallot mixture, add pepper to taste, simmer gently for 2 minutes.
I prefer an IPA when cooking seafood but if you don't like IPA's then try using something like Sam Adams.
Source: Family Oven
Thursday, June 23, 2011
Butternut Squash Soup

Ingredients
2 tablespoon(s) unsalted butter
1 cup(s) chopped onion
2 1/2 pound(s) butternut squash, peeled, seeded and cubed (about 6 cups)
1/2 Granny Smith apple, peeled, cored and diced
3 cup(s) low-sodium chicken broth
1 1/2 cup(s) apple cider
1/4 cup(s) apple brandy
1 1/2 teaspoon(s) salt
1/2 teaspoon(s) chopped fresh thyme
1/4 teaspoon(s) fresh-ground pepper
Directions
Melt the butter in a large stockpot over medium-high heat. Add the onions and sauté until softened, about 5 minutes. Add the squash and apple and sauté for 5 more minutes. Add the remaining ingredients and bring the mixture to a boil.
Reduce heat to a simmer, cover, and cook until the squash is tender, about 20 minutes. Remove from heat.
In small batches, carefully puree the soup in a blender or food processor until very smooth. Serve immediately or refrigerate for up to 3 days.
Photo by: Fimb
Wednesday, June 22, 2011
Chicken Corn Soup
Ingredients:
1 Whole chicken (3-3 1/2 lb. size) -- cut up
1 large Onion -- finely chopped
2 medium Carrots -- finely chopped
1 medium Russet potato -- peeled & diced
1/4 cup Chopped parsley
1/4 cup Canned tomato sauce
2 cans (14 1/2 oz. size) Chicken broth
1 can (17 oz. size) Cream style corn
2 medium Zucchini -- cut lengthwise into quarters, then thinly sliced
Salt & pepper to taste
Turn this recipe into a puzzle! [click]
Directions:
Rinse chicken, pat dry and set aside.
In a 4-qt. or larger electric slow cooker, combine onion, carrots, celery, potato and 3 T. parsley. Add chicken, then pour in tomato sauce and broth.
Cover and cook at low setting until chicken and potato are very tender when pierced, about 7 1/2-8 hours. Lift out chicken and let stand until cool enough to handle.
Meanwhile, skim and discard fat from broth mixture. Stir corn into broth mixture, increase cooker heat setting to high. Cover and cook 15 minutes more.
Remove and discard bones and skin from chicken; tear meat into bite-sized shreds. Add chicken and zucchini to soup; cover and cook until zucchini is just tender to bite, (10-15 minutes). Season to taste and sprinkle with remaining 1 T.parsley.
Source: Chicken Corn Soup Crock Pot Recipe #98725 @CDKitchen

Tuesday, June 21, 2011
Hector The Hero - Jenna Reid with Aly Bain
Jenna Reid - fiddle
Aly Bain - fiddle
Phil Cunningham - piano
Jerry Douglas - dobro
Aly Bain - fiddle
Phil Cunningham - piano
Jerry Douglas - dobro
Monday, June 20, 2011
New England Baked Beans
Ingredients:
4 slices bacon, chopped
3 cans (15 oz. size) Great Northern beans, rinsed and drained
3/4 cup water
1 small onion, chopped
1/3 cup canned diced tomatoes, well drained
3 tablespoons firmly packed brown sugar
3 tablespoons maple sugar
3 tablespoons unsulphered molasses
2 cloves garlic, minced
1/2 teaspoon salt
1/2 teaspoon dry mustard
1/8 teaspoon black pepper
1/2 bay leaf
Directions:
Cook bacon in large skillet until almost cooked but not crispy. Drain on paper towels.
Combine bacon and all remaining ingredients in slow cooker. Cover and cook on low 6 to 8 hours or until onions are tender and mixture is thickened. Remove and discard bay leaf before serving.
Source: CDKitchen
Sunday, June 19, 2011
Honey Roasted Peanuts
Ingredients:
* 1 lb peanuts, preferably raw
* 1/3 cup honey
* 2 tbsp butter
* 2 tsp salt, divided use
* 1 tsp vanilla extract
* 1/4 tsp cinnamon
* 1/4 cup granulated sugar
Preparation:
1. Prepare a baking sheet by lining it with aluminum foil and spraying the foil with nonstick cooking spray. Preheat the oven to 325 degrees F (160 C).
2. Place the butter, honey, vanilla, cinnamon, and 1 tsp salt in a large microwave-safe bowl and microwave until the butter is melted, about 45 seconds, stirring halfway through. Once melted, stir until the liquid is smooth.
3. Add the peanuts to the honey mixture and stir until they're all coated. Pour the peanuts out onto the prepared baking sheet and spread them into an even layer.
4. Bake the peanuts for a total of 20 minutes, stirring every 5 minutes to prevent burning. The peanuts at the edges will brown faster, so it's important to stir regularly to get an even roasting.
5. Once the peanuts are golden brown, remove them from the oven and stir again to distribute the honey on the baking sheet. After a minute or two, sprinkle the granulated sugar and remaining 1 tsp salt on top and stir again, to give them a bit of texture. As they cool at room temperature, stir occasionally, to break up any big clumps.
6. Once the peanuts have cooled completely, place them in an airtight container or plastic bag and store them at room temperature.
Source: About.com
Saturday, June 18, 2011
Beer Broiled Brats

Ingredients
2 bottles of Octoberfest or Vienna Style Lager
8 fresh bratwurst
1 large onion
8 hotdog rolls
Instructions
1. cut a large onion into 1" to 2" pieces. put onions, bratwurst into pot and pour inbeer. boil for 10-15 minutes at 350 degrees.
2. take onions and bratwurst out and grill bratwurst for an additional 5 minutes
3. place bratwurst, onions and all condiments in a roll and enjoy
Friday, June 17, 2011
Tuscan Style Beans With Rosemary
Ingredients:
1 tablespoon olive oil
3 ounces pancetta, finely chopped
1 large red onion, finely chopped
4 cloves garlic, minced
2 sprigs fresh rosemary
OR
1 tablespoon dried rosemary leaves
1/4 cup whole parsley leaves
1/2 teaspoon salt
1/2 teaspoon cracked or coarsely ground black pepper
1 can (28-ounce size) tomatoes
2 cans (19-ounce size) white kidney or cannellini beans, rinsed and drained
Directions:
In a skillet over medium-high heat, add oil. Add pancetta; cook until it just begins to brown.
Transfer to a slow cooker. Add onion to skillet, reduce heat to medium and saute until softened. Add garlic, rosemary, parsley, salt and pepper. Saute for 1 minute. Stir in tomatoes and bring to a boil, breaking up tomatoes. Cook for 2 minutes, stirring until liquid thickens.
Meanwhile, add beans to slow cooker. Pour tomato mixture over beans; stir well. Add just enough water to cover. Put cover on slow cooker and cook on low for 8 to 10 hours or high for 4 to 5 hours.
Source: Tuscan-Style Beans With Rosemary Crock Pot Recipe @CDKitchen

Thursday, June 16, 2011
Bean Soup with Winter Squash and Greens
Ingredients:
1 tablespoon butter
4 cloves garlic, minced
2 carrots, chopped
1 medium onion, chopped
6 cups reduced-sodium chicken broth
3 pounds buttercup squash, peeled and diced (about 6 cups)
1 plum tomato, chopped
1/4 teaspoon crushed red pepper
1/4 teaspoon salt
1/8 teaspoon freshly ground pepper
2 15-ounce cans pinto or other brown beans, rinsed
10 ounces spinach, stemmed and coarsely chopped
1 lime, cut into wedges
Instructions:
1. Melt butter in a Dutch oven over medium-high heat. Add garlic, carrots and onion and cook, stirring occasionally, until the vegetables are tender and lightly browned, 5 to 7 minutes. Add broth and scrape up any browned bits with a wooden spoon. Add squash, tomato, crushed red pepper, salt and pepper and bring to a boil. Reduce heat to a simmer and cook until the squash is very soft and almost breaking apart, about 20 minutes.
2. Transfer 3 cups of the soup to a blender and puree until smooth. (Use caution when pureeing hot liquids.) Return the pureed soup to the pot. Stir in beans and spinach and cook over medium heat until the beans are heated through and the spinach is wilted, about 5 minutes. Serve with lime wedges.
Wednesday, June 15, 2011
Panela Pralines Recipe
Ingredients:
* 1.25 cups finely chopped or shredded panela (from about 1.5 cones) OR 1 cup packed dark brown sugar
* 1/2 tsp salt
* 1 cup water
* 2 tbsp butter
* 1 cup toasted pine nuts
* 1 tsp vanilla extract
Preparation:
1. Prepare a baking sheet by lining it with aluminum foil and set aside for now.
2. Place the shredded panela, the salt, and the water in a small saucepan, stirring until the sugar dissolves. Insert a candy thermometer and cook, without stirring, until the mixture reaches 236 degrees F (113 C) on the candy thermometer.
3. Remove the pan from the heat, take out the thermometer, and stir in the butter. Set the pan aside to cool without stirring for 8 minutes.
4. Add the pine nuts and vanilla extract, and begin to stir steadily. After a minute or two, you will notice that the pine nuts are completely coated with the candy, and that it is beginning to lose its shiny gloss and get thicker and slightly opaque. At this time, stop stirring and start dropping it by spoonfuls onto the prepared baking sheet.
5. If the candy seizes before you have finished portioning it all out, add a small spoonful of very hot water and stir--this should loosen the candy and allow you to scoop the rest of it. Once all the candy is scooped, let them stand until they have completely set.
6. Store Panela Pralines in an airtight container at room temperature for up to two weeks.
Source: Panela Pralines Recipe - How to Make Panela Pralines - Pralines Candy Recipe

Tuesday, June 14, 2011
Zucchini Crust Pizza
Here is a low carb pizza recipe to help you control your blood sugar. An Amazing 10 carbs per serving.
Source: Zucchini Crust Pizza Recipe
Olive oil and flour for the pan
2 cups (packed) grated zucchini
2 eggs, beaten
1/4 cup flour
1/2 cup grated mozzarella
1/2 cup grated parmesan
1/4 teaspoon dried basil
2 tablespoons olive oil
Preheat oven to 400 F. Drizzle a little olive oil in a 10" pie pan and coat lightly with flour.
Combine the zucchini, eggs, flour, mozzarella, parmesan, basil, and 1 tablespoon olive oil in a bowl and mix well. Spread into the pie pan and bake for 35 to 40 minutes or until golden brown. About halfway through the baking, brush with the remaining olive oil. Remove from oven. When it has cooled for about 10 minutes, use a spatula to loosen the crust from the pan so it won't break later.
Top with your favorite pizza items and bake at 400 F until heated through.
Source: Zucchini Crust Pizza Recipe
Monday, June 13, 2011
30 Day Wine
24 oz Welch's frozen concentrated grape juice, thawed
3 cups sugar
water to make up one gallon
1/2 tsp dry yeast
1 1-gallon glass jug.
Mix all ingredients together well with water filling jug to about an inch below the shoulders.
Cover with a clean rag secured with rubber band.
Keep in a dark place about 70 degrees.
About 2 weeks later replace rag with a good thick piece of plastic wrap.
After 30 days from starting date, siphon wine off from sediment in bottom and drink.
Sunday, June 12, 2011
Farmers Cheese

INGREDIENTS
1 gallon whole milk
1 pinch salt
1 large lemon, juiced
DIRECTIONS
Pour the milk into a large pot, and stir in a pinch of salt. Bring to a boil over medium heat, stirring occasionally to prevent the milk from scorching on the bottom of the pot.
When the milk begins to boil (small bubbles will first appear at the edges or if using a thermometer 190 degrees F ), turn off the heat. Stir lemon juice into the milk, and the milk will curdle. You may need to wait 5 or 10 minutes.
Line a sieve or colander with a cheesecloth, and pour the milk through the cloth to catch the curds. What is left in the cheesecloth is the Farmer’s Cheese. The liquid is the whey. Some people keep the whey and drink it, but I throw it away. Gather the cloth around the cheese, and squeeze out as much of the whey as you can. Wrap in plastic, or place in an airtight container. Store in the refrigerator.
Saturday, June 11, 2011
Cream Cheese

Ingredients
1 gallon goat's milk (store-bought cow's milk will work too!)
¼ tsp. direct set mesophilic-m culture
2 Tbsp. diluted rennet (add 1 drop of rennet to 5 Tbsp. cool water)
Instructions
In a large pot add goat's milk. Heat milk to 80 degrees. Remove from heat and add the mesophilic-m culture and stir will. Add the rennet and stir. Cover the pan and let sit undisturbed at room temperature for 12 to 18 hours.
After the time is up, what you have in the pot should look like very thick yogurt. Now you will drain and drip your cheese.
Line a colander with your clean cheesecloth. You can use a pillowcase if you do not have cheesecloth. Set this colander in a large bowl to catch the whey. Now drain your thick, yogurt-looking cheese into this cloth. Gather up the cloth and tie it tightly. Now you need to hang it somewhere so that the remaining whey will drip out. Generally, I hang it over the kitchen sink, so that it drips into the sink. Now let your cream cheese drain for about 6 to 8 hours. You can speed this process along by stirring the cream cheese about halfway through the time, and you can do it again if you need to.
When it is completed, what you have left is your cream cheese! You can salt it a bit or not; that is up to you. It is ready to be used right away over a homemade bagel, or you can use it for cooking or even cheesecake! You can also put some of the cream cheese in a food processor and blend it up a lot and you will end up with a great substitute for sour cream.
Source: Gourmet Sleuth
Friday, June 10, 2011
How Much Space Do You Need For A Vegetable Garden
Not much. Truthfully, it depends on the types of veggies you want to grow and how many. But you'll want to know what you have to work with before you choose your vegetable seeds or seedlings. For example, if your kids really want to grow giant pumpkins, a good-sized part of the yard or a large raised bed could easily be devoted to pumpkins. But, one thing is for sure, you absolutely do not need what is referred to to as "land" to plant a vegetable garden. Not even close.
Read More At: Vegetable Gardener
Thursday, June 9, 2011
Diabetes information
Author: john alter
It is sometimes difficult in the United States to find type II diabetes information relating to natural cures or herbal
remedies. We have accumulated some diabetes info that may be of interest to anyone who is interested in dietary or herbalsupplements that have been proven in clinical and laboratory studies to naturally lower blood sugar levels.
Part of the diabetes information is that, there are two forms of diabetes conditions that exist today. The first one is known as diabetes mellitus while the second one is known as diabetes insipidus. Diabetes mellitus refers to the condition where sugar levels in the body rises beyond the levels accepted. This situation is usually caused by the inability of the body to either produce or respond to a hormone known as insulin. Insulin is a hormone that is in charge of allowing the glucose content in the body to enter the body cells so as it can be used to produce energy for the body to utilize.
Whenever a person suffers from diabetes mellitus he or she usually has symptoms such as, an extreme
feeling of thirst, excessive cases of urination, vomiting experiences and so on.
One of the first things you should be aware of is the difference between type 1 and type 2 diabetes. Type 1 diabetes, which usually occurs in young children and some young adults, occurs when the pancreas is unable to secrete the insulin that is necessary to deliver sugar as fuel to the body's cells. However, type 2 diabetes occurs in older adults (and even more often in senior citizens) of African-American, Latino, and Asian American backgrounds. In these cases it is the cells that become insulin resistant and cannot absorb the sugar necessary for cell energy, and this sugar remains in the blood.
The population of diabetes patients is awesome. They are a pressure group, a lobby and influence the decision of the policy makers. There are statutory rules governing food and consumer items for the diabetes patients that help them in selecting foods for a healthy meal plan.
Now that the risks are there to help one decide whether to get tested or not, there are other diabetes information the doctor will need for proper diagnosis. The doctor may think a patient has diabetes because of the symptoms but to be sure, blood tests are used.The random blood glucose test is also simple. There is no special preparation like an overnight fast. The oral glucose tolerance test is different. It is hardly used now because the other tests are less expensive. This involves an eight hour fast. The patient will be asked to drink eight ounces of liquid that contains about 75 grams of sugar.
Diabetes is actually a metabolic disorder wherein the body feels an acute lack of the energy-producing hormone, insulin. Insulin, which is produced by cells in the pancreas, break down the food we eat and convert it into energy, which helps us carry on our daily activities.Dietary supplements like antioxidants may help reverse deficiencies that have developed as a result of diabetes, protect your body from diabetes-related damage, improve your metabolism so you have more energy, and help to stabilize blood sugar.
About the author:
Read about href="http://diabetesmellitus-
href="http://diabetesmellitus-
Wednesday, June 8, 2011
Simple Amber Vienna Lager Recipe
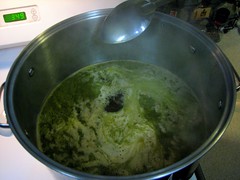
Photo by: Terwilliger911
6.3 lb unhopped Amber malt extract (Nortwestern, LaGrange shop)
2.0 oz hop pellets (Nugget,11.1% alpha, 20 min)
1.0 oz hop pellets - flavor (Willamette, 4.0% alpha, 10 min)
1.0 oz hop pellets - aroma (Willamette, 4.0% alpha, 2 min);
Wyeast #2112 (California lager)
Procedure:
- Starter: Wyeast (lager, 2 days before, only original starter)
- Boil water and cool with a chiller (~3 gallon), move chiller up & down to aretate.
- Add malt extract except hop pellets and yeast and bring to boil.
- Add hop pellets, heat to boiling, watch for the foam, stir for 20 min.
- Last 10 min. boil with flavor hops.
- Last 2 min. boil with aroma hops.
- Mix the wort with water in the fermenter, check temperature to be 60-70 F, use chiller if needed, move chiller up & down to get air into the wort.
- Mix yeast starter with wort, cover with the lid, insert air lock, wait for fermentation to start.
- Move the fermenter to the ~50 F place (garage) for fermentation.
Source: Eric's Beer Page
Tuesday, June 7, 2011
Feta Cheese

INGREDIENTS AND EQUIPMENT:
1 gallon fresh goat’s milk (You can use store-bought cow’s milk as well.)
1 Tbl fresh yogurt
½ tablet rennet, dissolve in 1/4 cup water
1+ gallon pot with lid
1 long bladed knife
2 clean sterile handkerchiefs
strainer
cheese mold: Cut the ends out of a smooth-sided 4 x 5 inch tin can, save one of the cut ends.
table salt
STEPS:
Warm milk to 30°C (86°F) . Stir regularly so that it does not burn on the bottom. (Less stirring is required if the pot has a thick heat dissipating bottom.) Remove from heat.
Mix 1 Tbl yogurt with equal part milk to blend, then stir the blended yogurt and milk into the warmed milk to thoroughly mix. Cover and let inoculated milk sit for one hour at room temperature.
While the inoculated milk sits, dissolve 1/2 tablet rennet in fresh cool water.
After the inoculated milk has sat for one hour, add dissolved rennet to the inoculated milk, stir to mix thoroughly.Let the inoculated, renneted milk sit covered overnight at room temperature.
The next morning, the milk should have gelled. Some of the whey will have separated. Check for a clean break.
Cut curd as per basic cheese : start at one side, cut straight down to bottom. Make the next cut ½ inch from and parallel to the first, but sloping slightly (the sliced curd will be wider at bottom than top). Repeat increasing angle with each cut . Turn pot 90°, repeat cuts . Repeat cuts and turning two more times. The curd pieces should be about ½ inch cubes.
With very clean hand and arm, reach to the bottom and gently lift the curds to stir. Cut large pieces which appear with a table knife so that they are ½ inch cubes . Let the cut curds sit, with occasional stirring, for 10-15 minutes until curd is somewhat contracted.
Decant off the whey through the strainer lined with the handkerchief, pour curds into handkerchief. Save the whey to make whey brine. Let drain until no more whey drains out (about 2-4 hours). It may be drained at room temperature, or in the refrigerator.
Place drained curds into a bowl, mix in a ½ tsp salt, breaking up the curd.
Press into mold as per basic cheese: Line can with handkerchief, place curds inside, fold over ends of cloth, place end on top, and place weight on top of that. Let sit overnight.
Prepare pickling whey brine (12.5% salt): 20 oz of whey plus 5 Tbl salt. Stir to dissolve. The brine must be acidic or else the cheese will melt on the surface
Cut cheese into 1.5 inch cubes, place into wide-mouth jar. Pour brine over to cover . Let pickle for several days in the refrigerator. The cheese will become drier and more easily crumbled with time. Store in the frig.
Rinse before use to remove excess salt .
Subscribe to:
Posts (Atom)